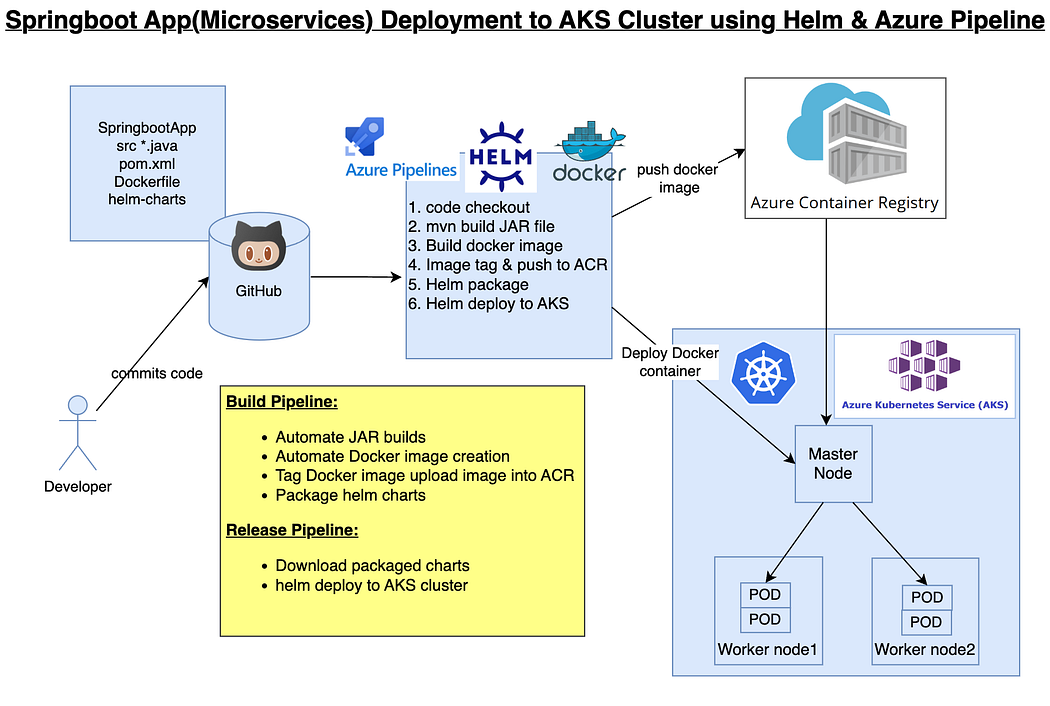
Learn how to deploy a Spring Boot microservice App as a Docker container on an Azure Kubernetes Cluster (AKS) using Helm and Azure Pipelines.
Click here: Project Code
What is Helm?
Imagine you want to build a big LEGO castle with many different pieces. Instead of manually putting each piece in the right place, Helm is like a special tool that helps you assemble the castle faster and easier.
In the world of software, Helm is a tool that helps developers manage and deploy complex applications, like a website or a web service, on a cloud platform. It does this by packaging all the necessary pieces of the application, called “charts,” into a single bundle. These charts include things like the code, configurations, and dependencies needed for the application to work.
Just like the LEGO castle, Helm makes it easier to deploy the application on different cloud environments, like Azure or AWS. It knows how to handle all the necessary settings and configurations to make the application run smoothly.
So, instead of spending a lot of time and effort setting up and configuring all the parts of an application separately, Helm lets developers package everything together and deploy it quickly and consistently. It’s like having a magical tool that simplifies the process of building and deploying software.
Helm Charts
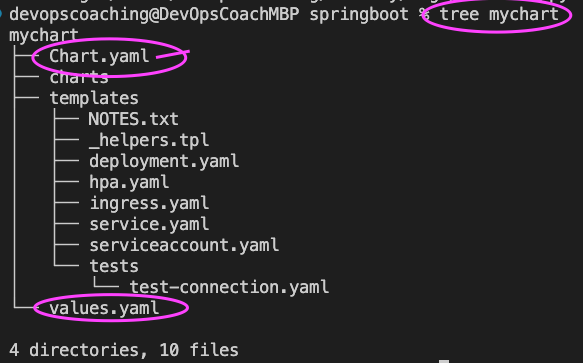
Helm utilizes a packaging format known as Charts, which are collections of files used to describe a group of Kubernetes resources. These Charts serve as valuable tools for defining, installing, and upgrading intricate Kubernetes applications. Creating, versioning, sharing, and publishing Charts is a straightforward process.
Implementation Steps:
- Create a resource group, AKS cluster and Azure container registry
- Provide pull access for AKS to pull image from ACR
- Create namespace for helm deployment
- Create helm chart for spring boot app
- Create a build pipeline to automate docker image
- Customize pipeline with helm package tasks
- Create a release pipeline
- Customize pipeline with helm upgrade tasks
- Run the pipeline to deploy springboot app into AKS
- Verify deployments in the namespace in AKS
- Use kubectl port forward to access app locally
- Access the app in the browser
Pre-requisites:
- Azure CLI is installed on your local machine.
- Helm installed
- kubectl installed
- Azure subscription, click here if you don’t have one.
- AKS cluster needs to be up running. You can create AKS cluster, ACR Repo using shell script provided below.
#!/bin/sh

# This is the shell script for creating AKS cluster, ACR Repo, and a namespace

# Create Resource Group
AKS_RESOURCE_GROUP=aks-rg
AKS_REGION=eastus

# Set Cluster Name
AKS_CLUSTER=aks-cluster

# Set ACR name
ACR_NAME=myacrrepo1996

echo $AKS_RESOURCE_GROUP, $AKS_REGION, $AKS_CLUSTER, $ACR_NAME

# Create Resource Group
az group create --location $AKS_REGION --name $AKS_RESOURCE_GROUP

# Create AKS cluster with two worker nodes
az aks create --resource-group $AKS_RESOURCE_GROUP \
              --name $AKS_CLUSTER \
              --node-count 2

# Create Azure Container Registry
az acr create --resource-group $AKS_RESOURCE_GROUP \
              --name $ACR_NAME \
              --sku Standard \
              --location $AKS_REGION

# Providing required permission for downloading Docker image from ACR into AKS Cluster
az aks update -n $AKS_CLUSTER \
              -g $AKS_RESOURCE_GROUP \
              --attach-acr $ACR_NAME

# Configure Kube Credentials
az aks get-credentials --name $AKS_CLUSTER \
                      --resource-group $AKS_RESOURCE_GROUP

# Create a namespace in AKS cluster for Helm deployment
kubectl create namespace helm-deployment
- Azure DevOps project dashboard in https://dev.azure.com/
- Dockerfile created along with the application source code for springboot App.
- Make sure AKS has pull access from ACR
Create Helm chart using helm
- Navigate to the main directory of your repository, where you have the source code for your Spring Boot application. To create a Helm chart, run the following command:
helm create mychart
Tree mychart
- Execute the above command to see the files created.

Before deploying to an AKS cluster, it is important to include the Docker image details that need to be downloaded from Azure Container Registry (ACR).
Open mychart/values.yaml

image:
repository: myacrrepo1993.azurecr.io/osomudeya/springboot-docker
pullPolicy: IfNotPresent
# Overrides the image tag whose default is the chart appVersion.
tag: “”
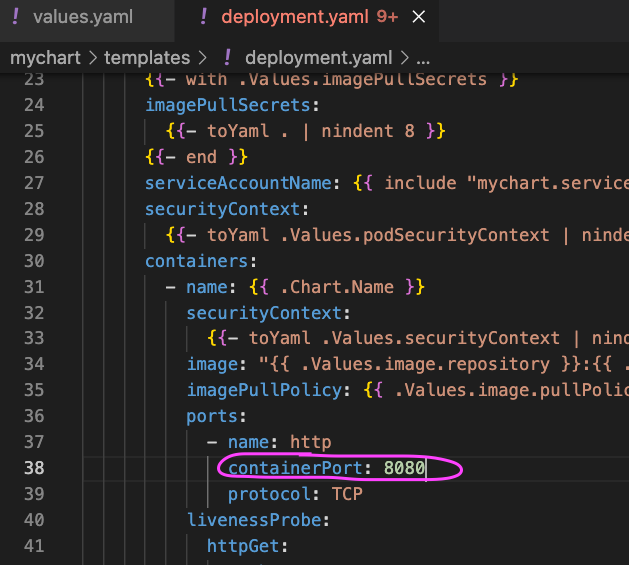
- Open mychart/templates/deployment.yaml and change containerPort to 8080
- Save the filesby by committing and pushing them to the source code repository you are utilizing..
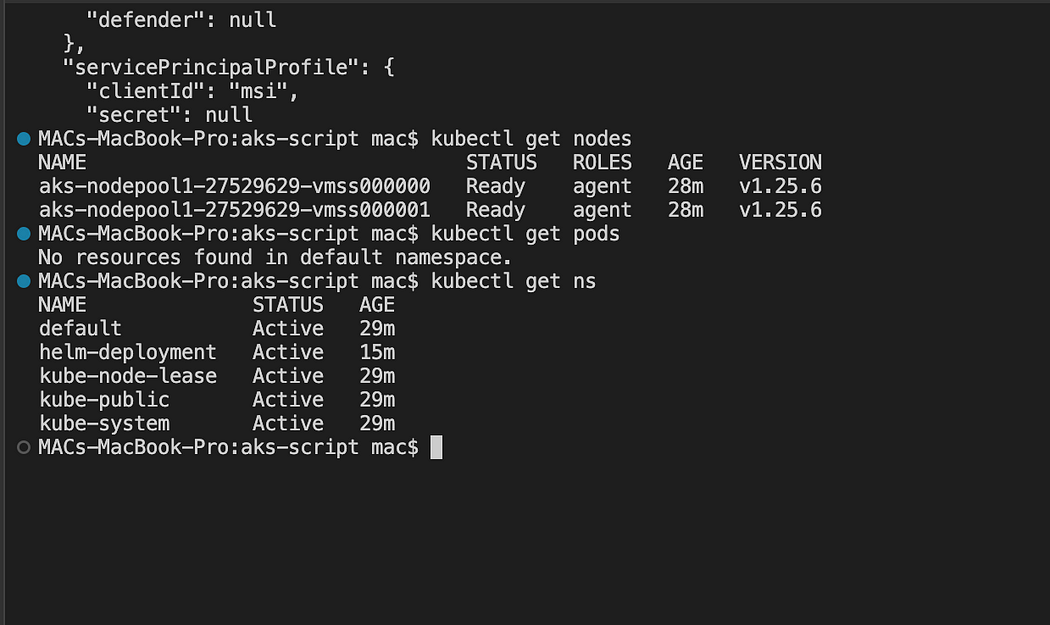
Make sure worker nodes are running
kubectl get nodes
Pipeline Implementation Steps:
- Part 1 — Create an Azure Build pipeline to build a Docker image, upload it to Azure Container Registry (ACR), and package a Helm chart.
- Part 2 — Create an Azure Release pipeline to deploy Spring Boot Docker containers to Azure Kubernetes Service (AKS) using the helm upgrade task.
Part 1 — How to create a Azure Build Pipeline
- Login into your Azure DevOps dashboard
- Click on Pipelines.
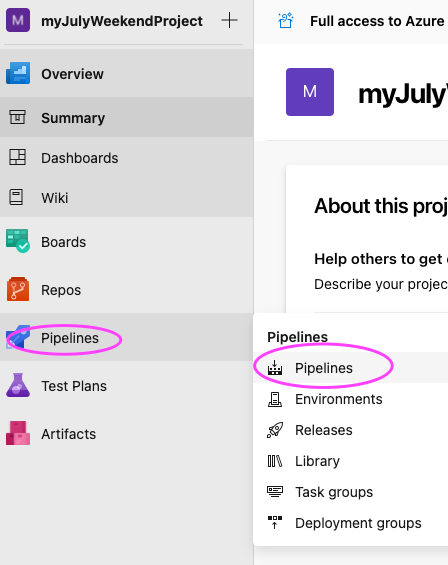
- Click on New Pipeline

- Click on use the classic editor
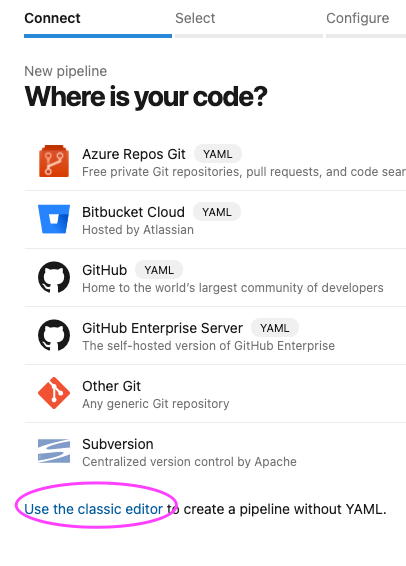
- Enter the name of your repository and the branch where your source code, along with the Dockerfile, is stored.
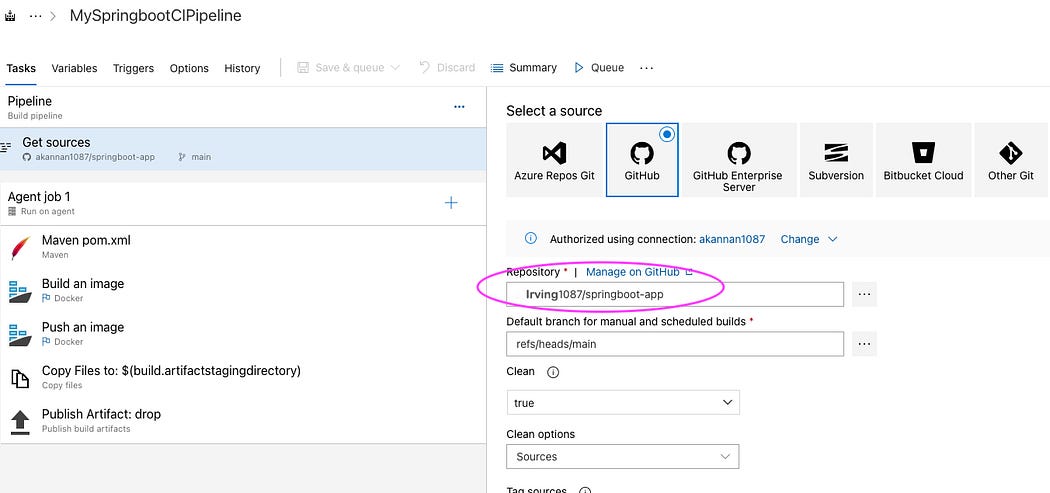
- Proceed by clicking on the “Continue” button, then select the Helm template and choose Azure Kubernetes Service. Finally, click on “Apply” to proceed.
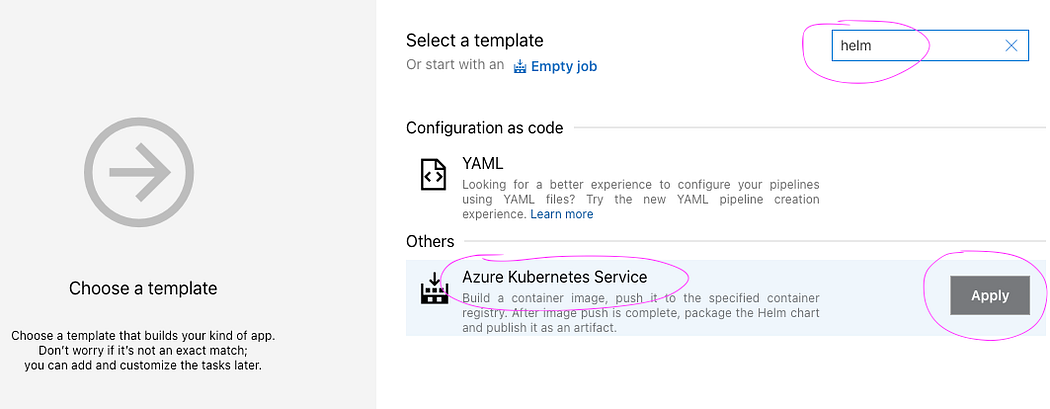
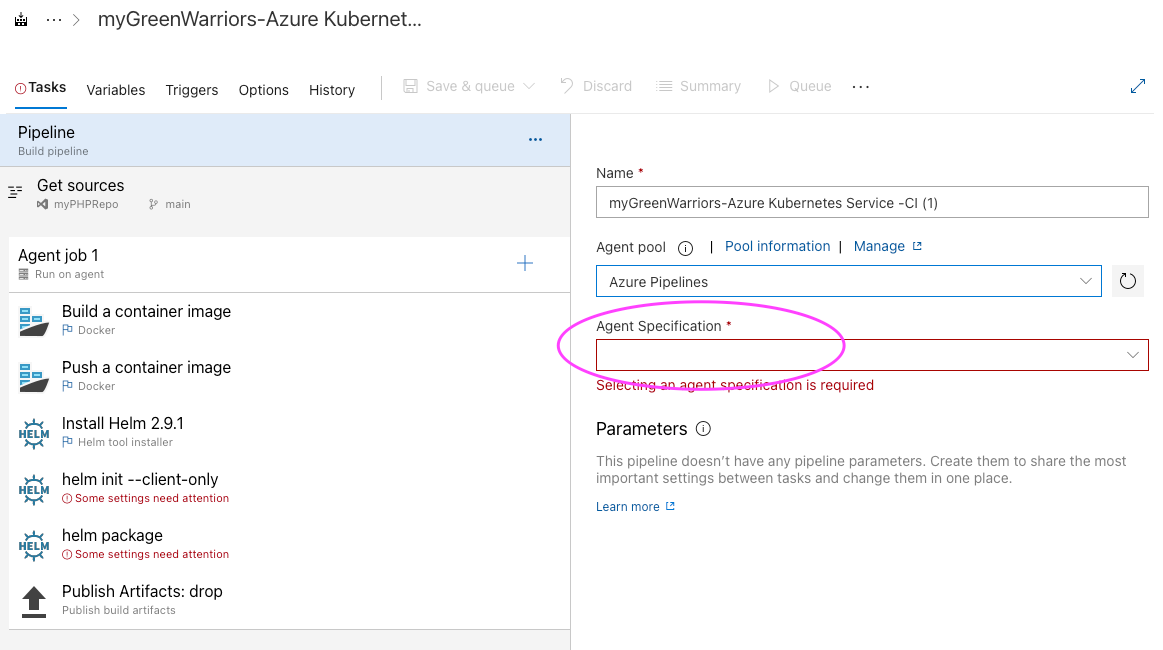
- The pipeline has been set up with six tasks in place. It is now time to customize the pipeline
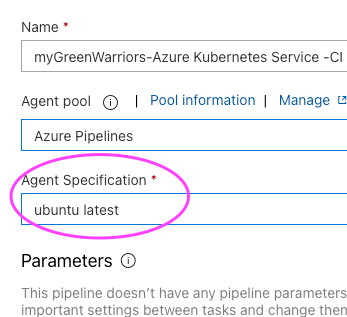
- Select Ubuntu as the build agent from the Agent specification drop-down menu, ensuring that the Windows server is avoided as the build agent.
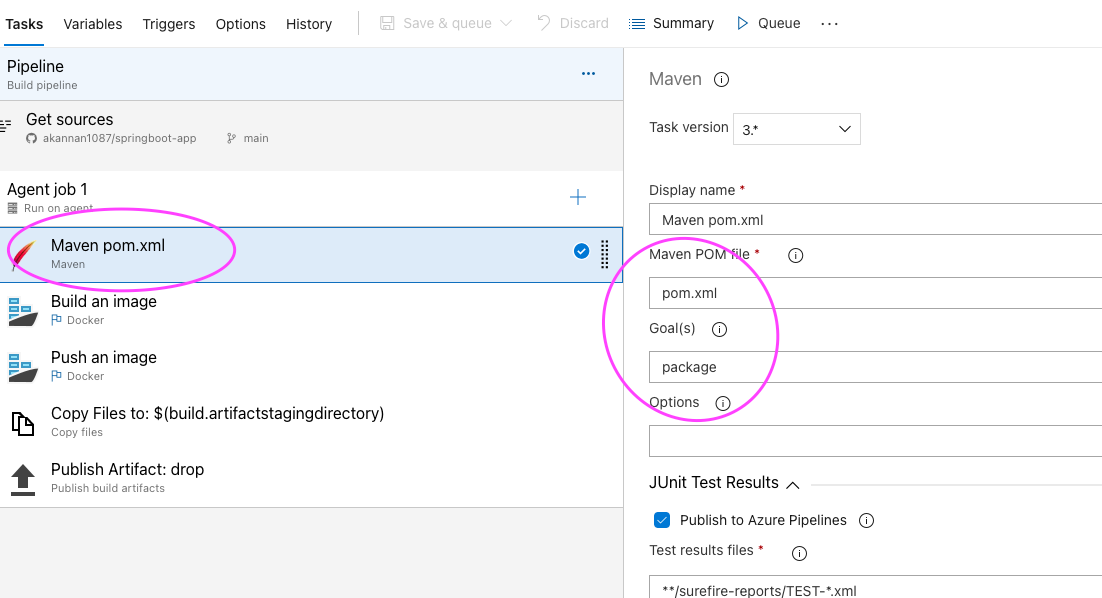
- Add Maven build task for building the JAR file.
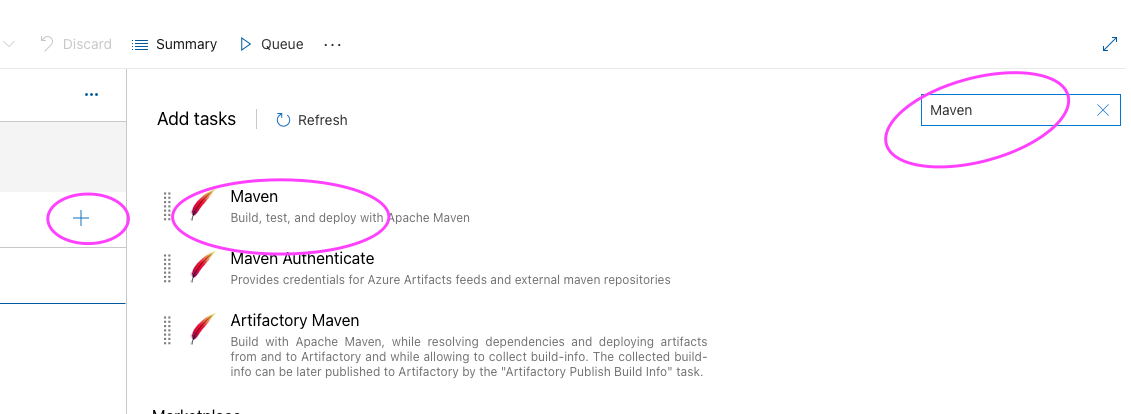
- Click on + icon and type Maven. this should be the first task.
- And then enter maven goal as package
- Let’s modify Build an image task.
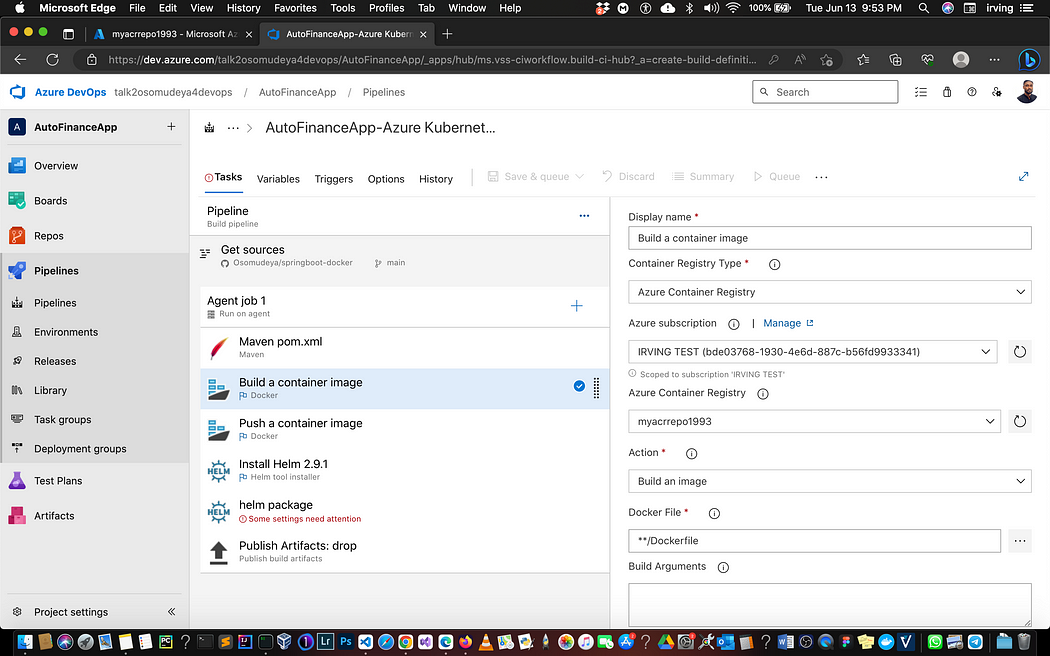
- Select Push an image task
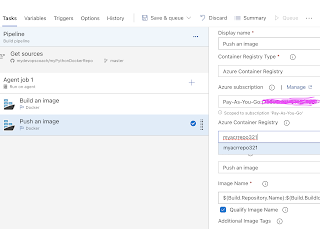
- Leave Install Helm Task as it is, we need that task to install Helm on build agent.
- Remove helm init task by selecting remove selected task
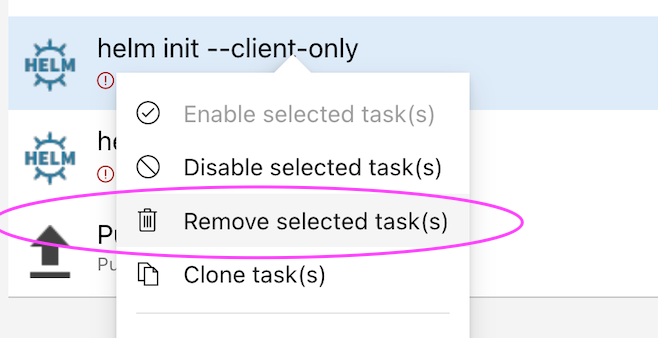
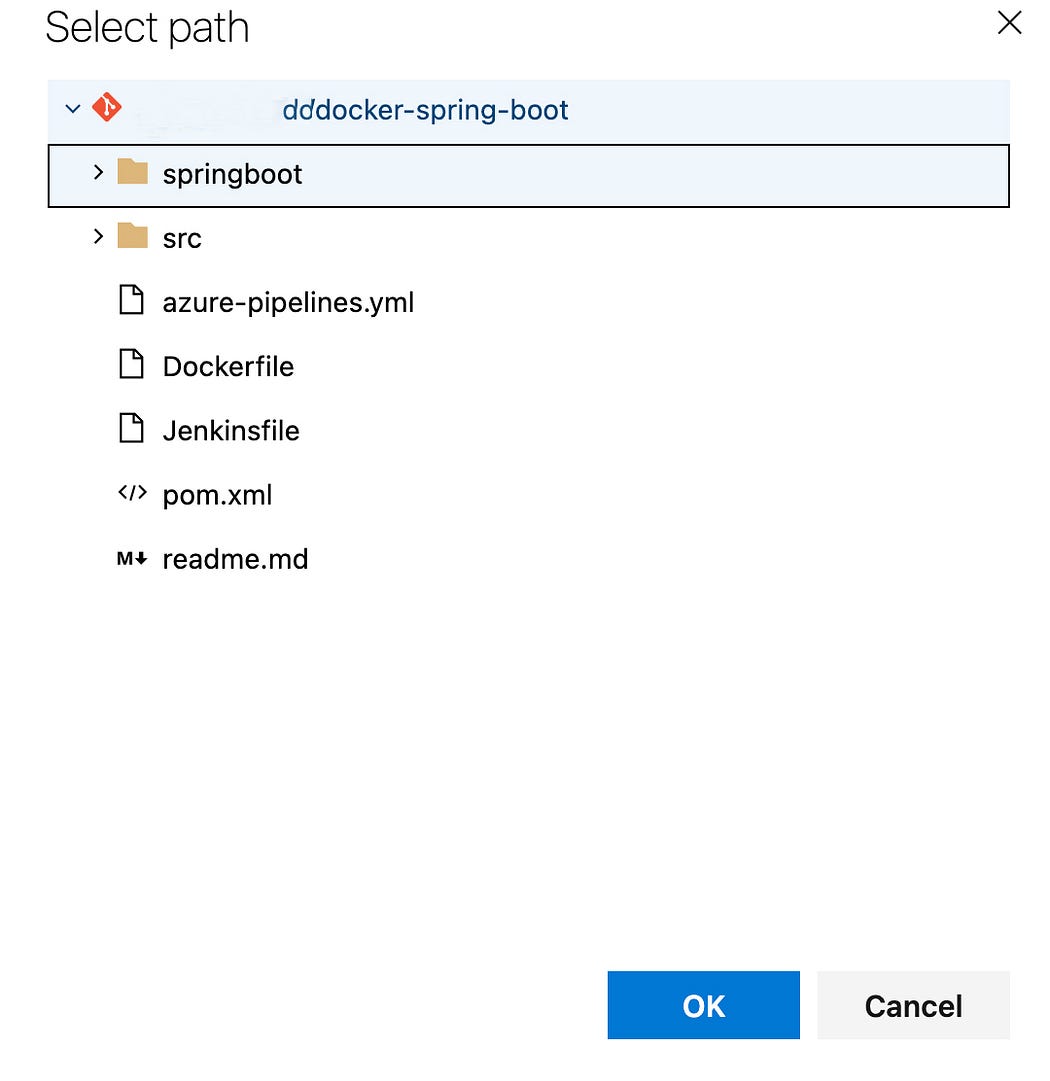
Customize helm package task, select Chart Path by clicking … dots
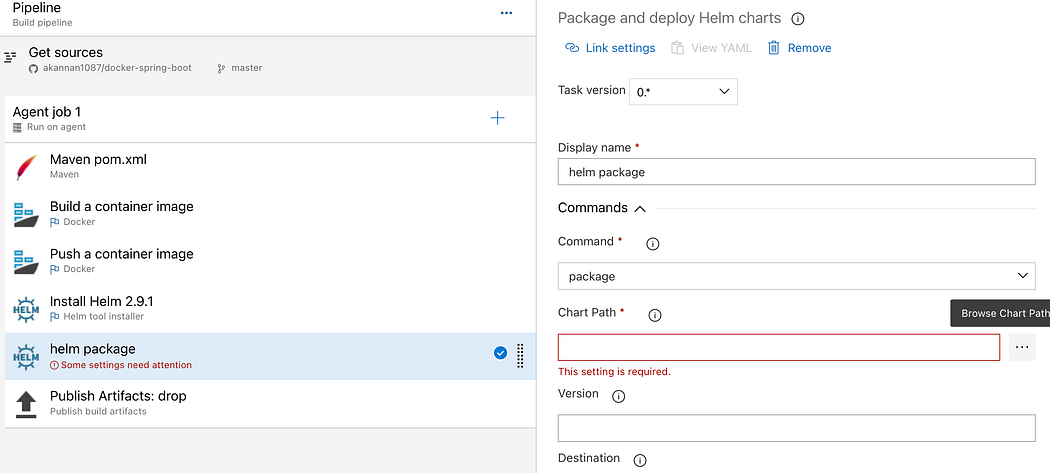
Choose the folder where you have helm chart files, select OK
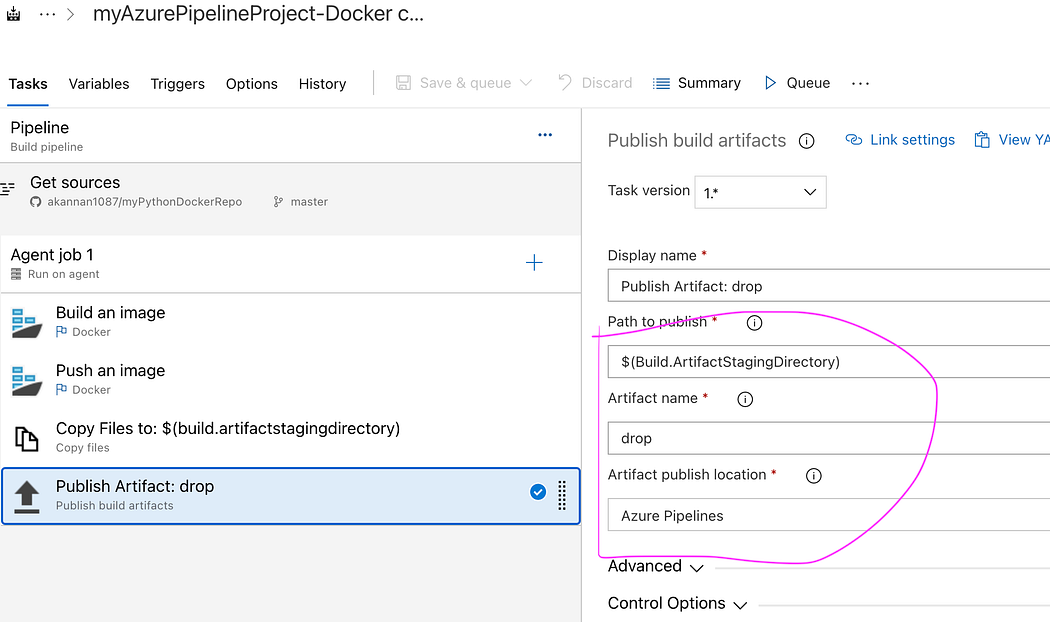
Leave Publish artifact task as it is.
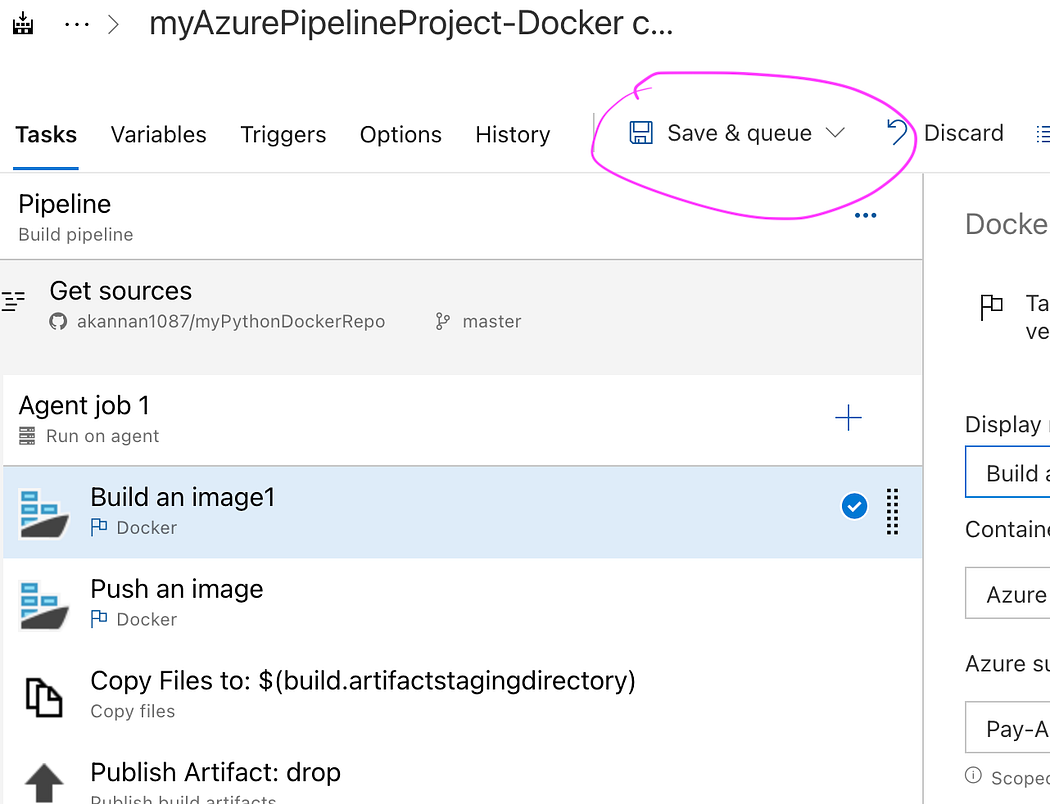
Now click Save + Queue and run to start Building the pipeline
- Check build output..
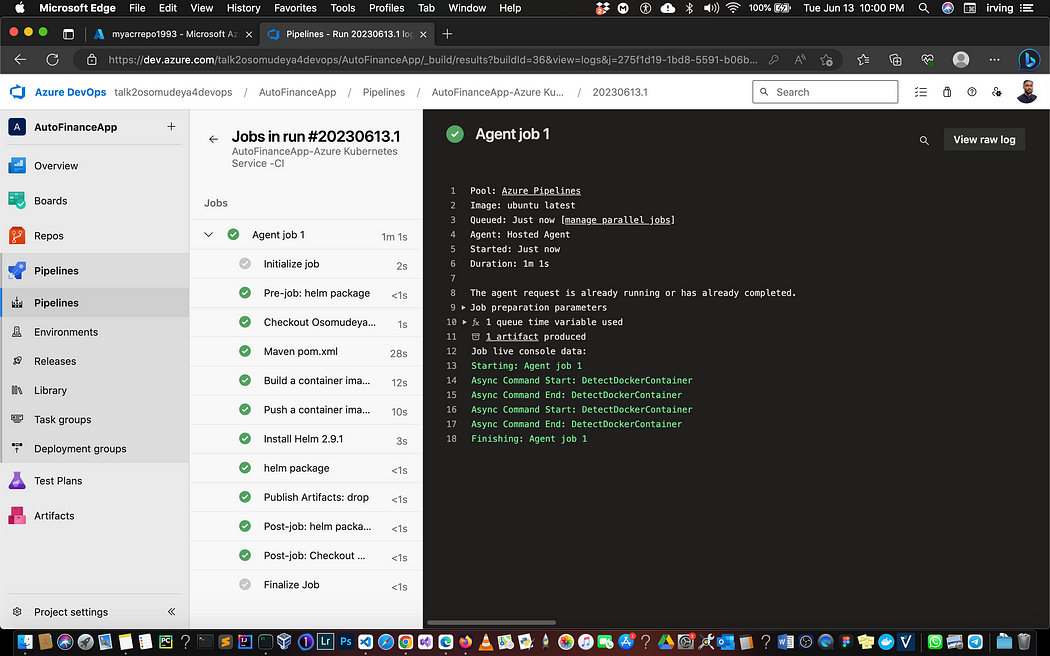
- Once the build is completed, you should be able to see the Docker image in Azure Portal under Resource Group, ACR repo name → Repositories
Part 2 — How to Create Release pipeline for deploying Springboot Microservices containers into AKS Cluster
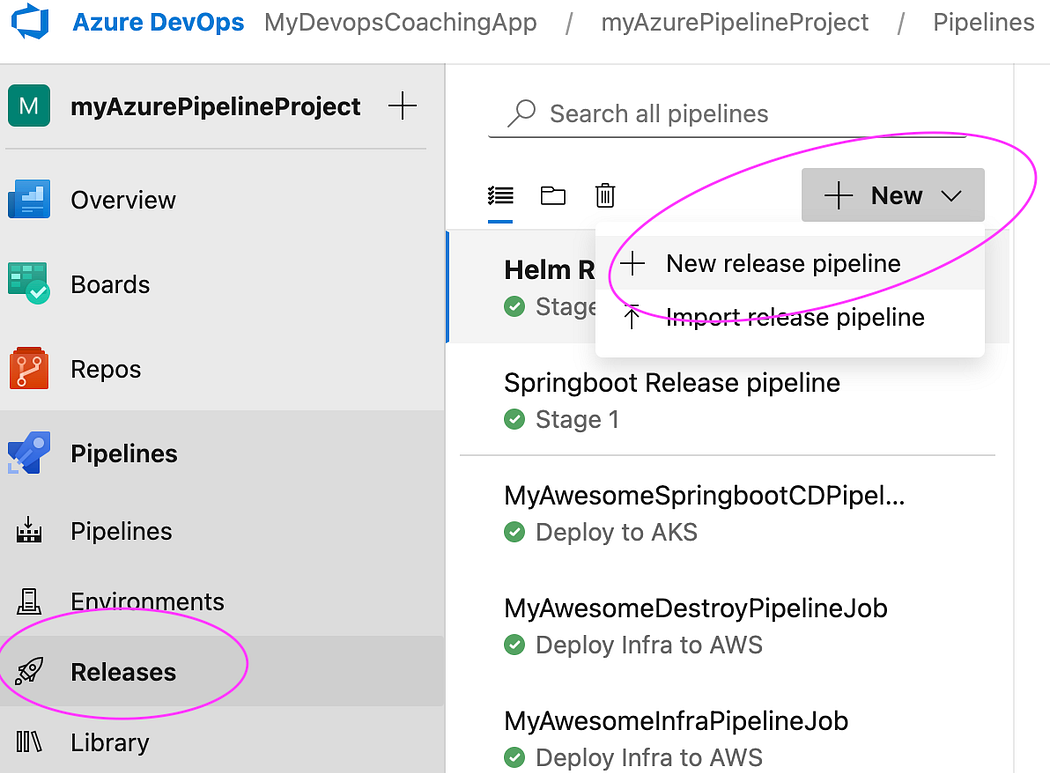
- Go to Pipelines → Click on Releases → New Release pipeline
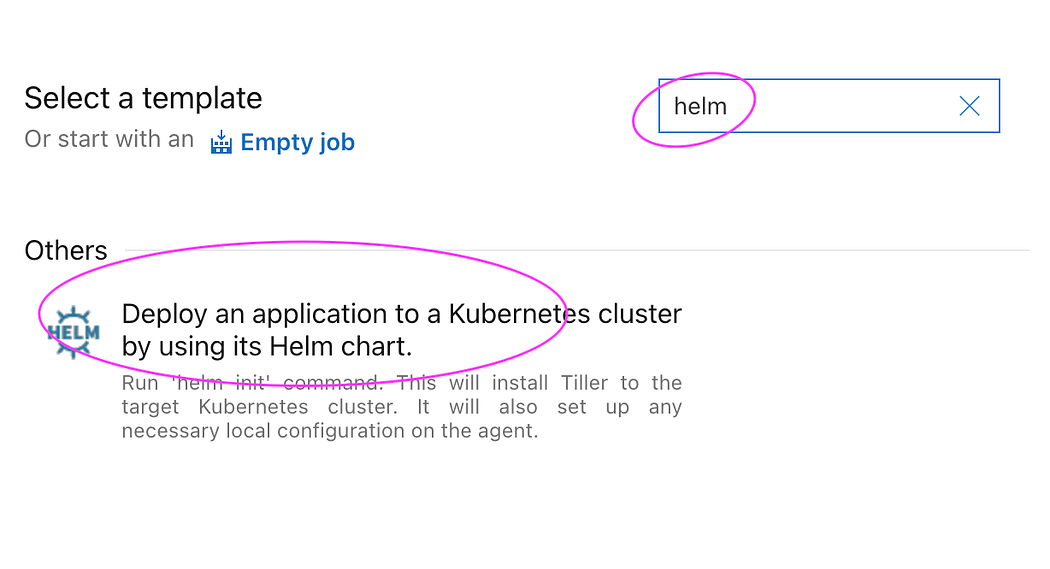
- Click on Stage 1 and choose a template by typing helm and choose Deploy an application to K8S cluster using helm chart
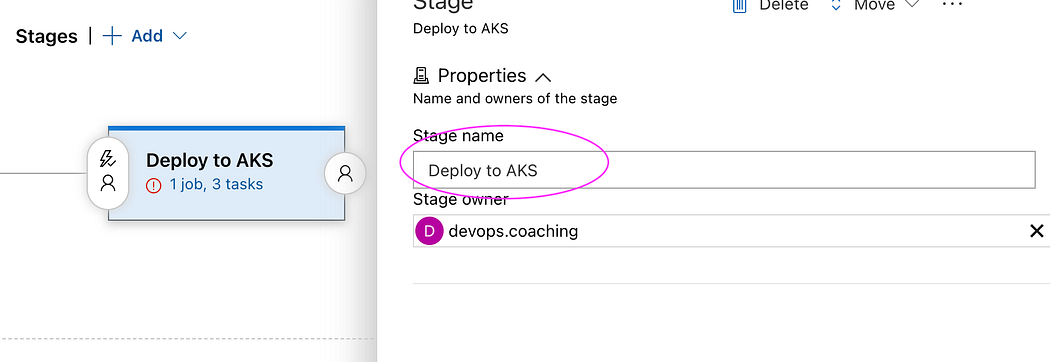
- Change the stage name to Deploy to AKS
- Now click on Add an artifact
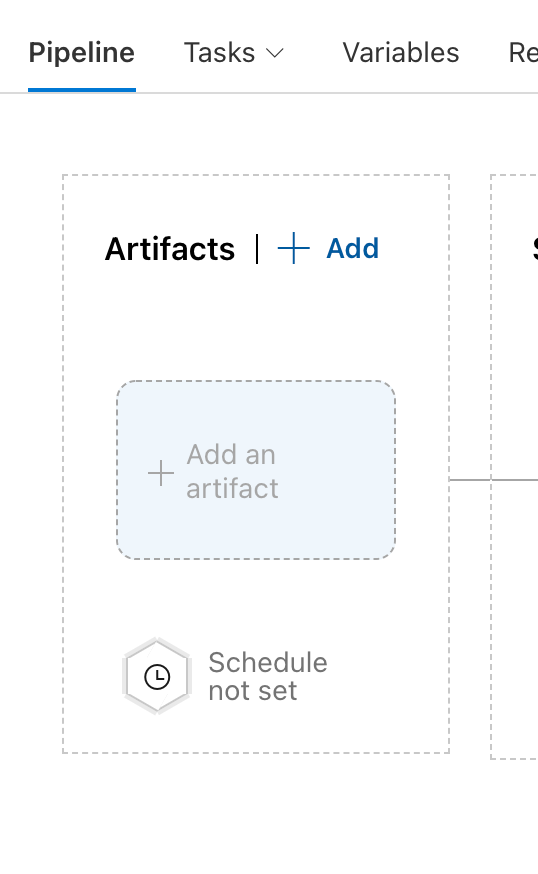
- Select the Build pipeline and click on the latest version
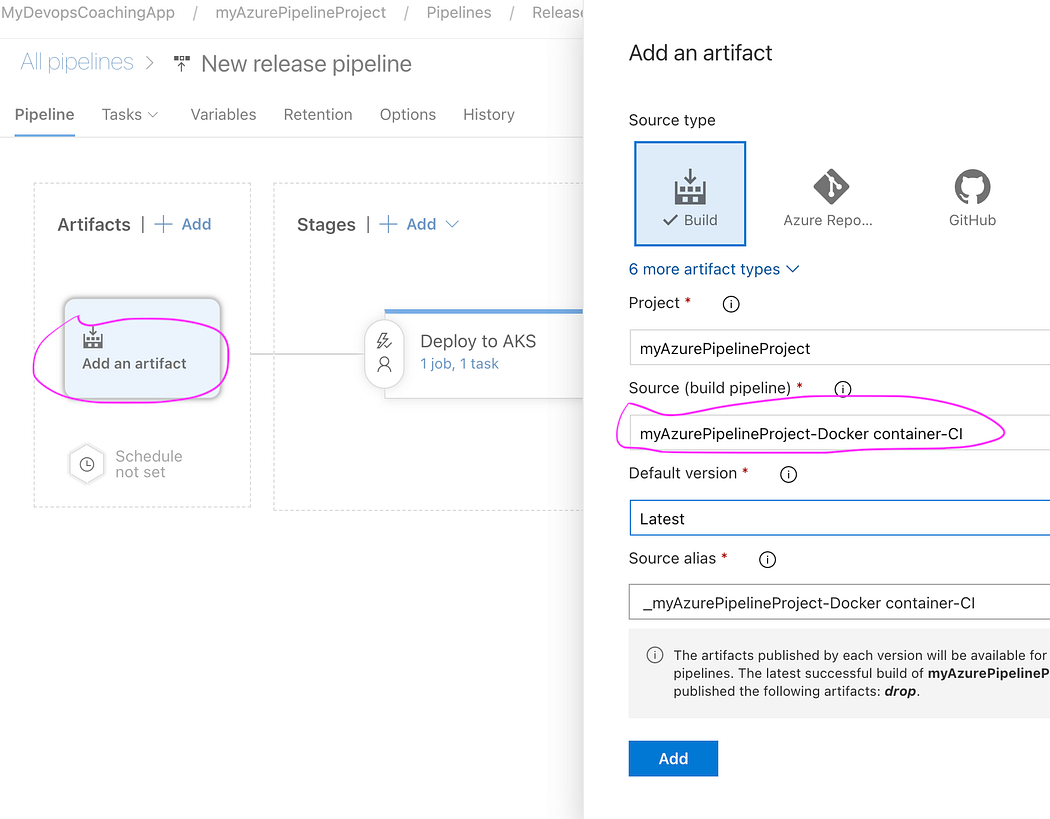
- Now click on Deploy to AKS stage. Click on Deploy to AKS
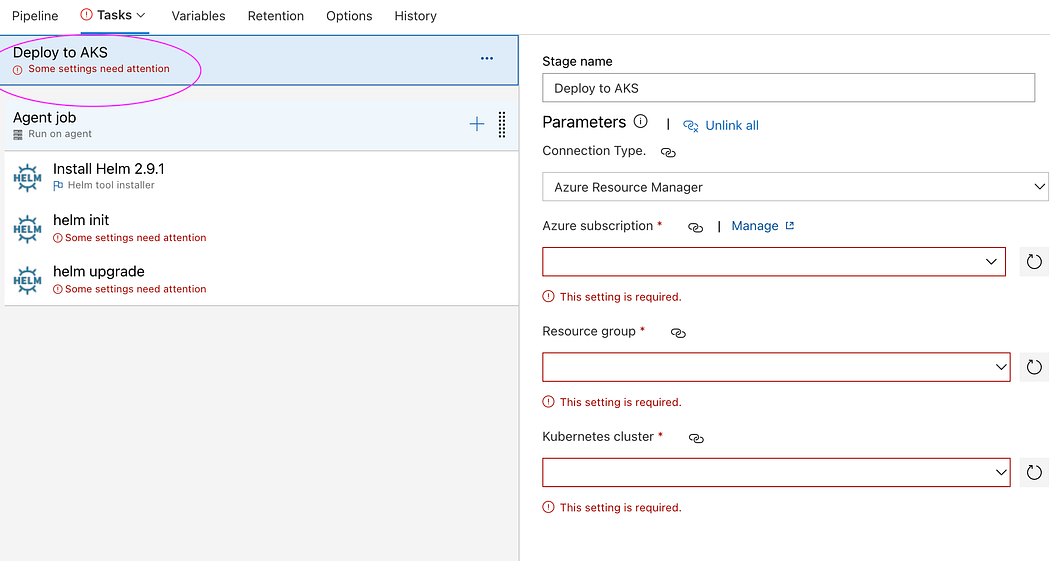
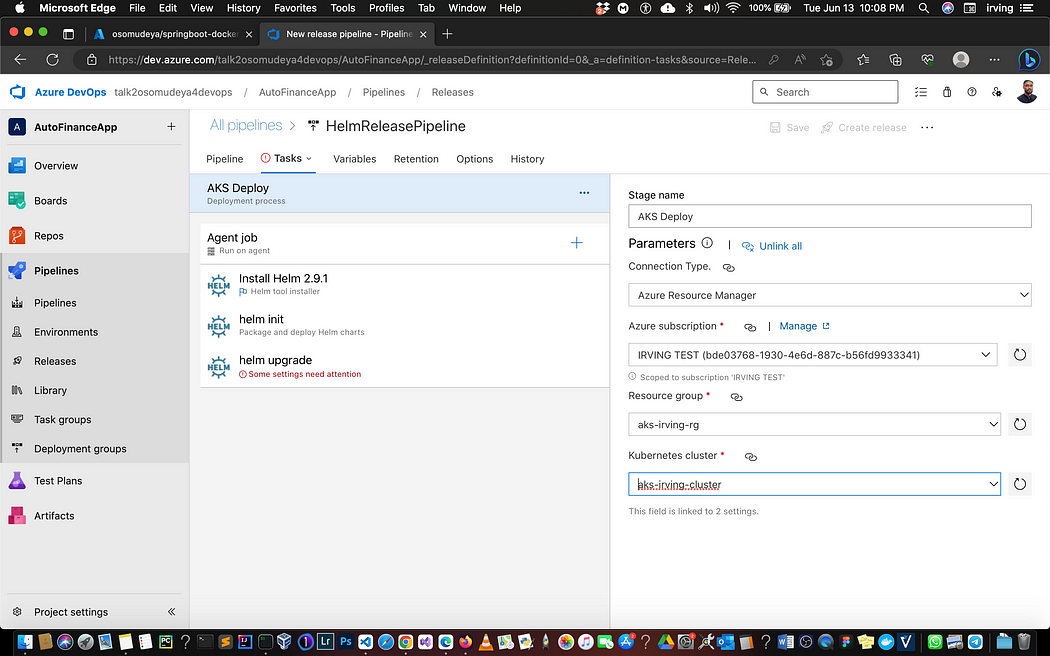
- Enter right value for Azure subscription, Resource group and AKS Cluster by selecting from down down.
- Now click on the Agent Job, and select Azure pipelines and choose Ubutu as Build agent, avoid windows agents.

- Leave install Helm 2.9.1 task and make sure check for latest version of Helm. this will install latest version of Helm which is 3.x

- Remove helm init task by selecting remove selected task

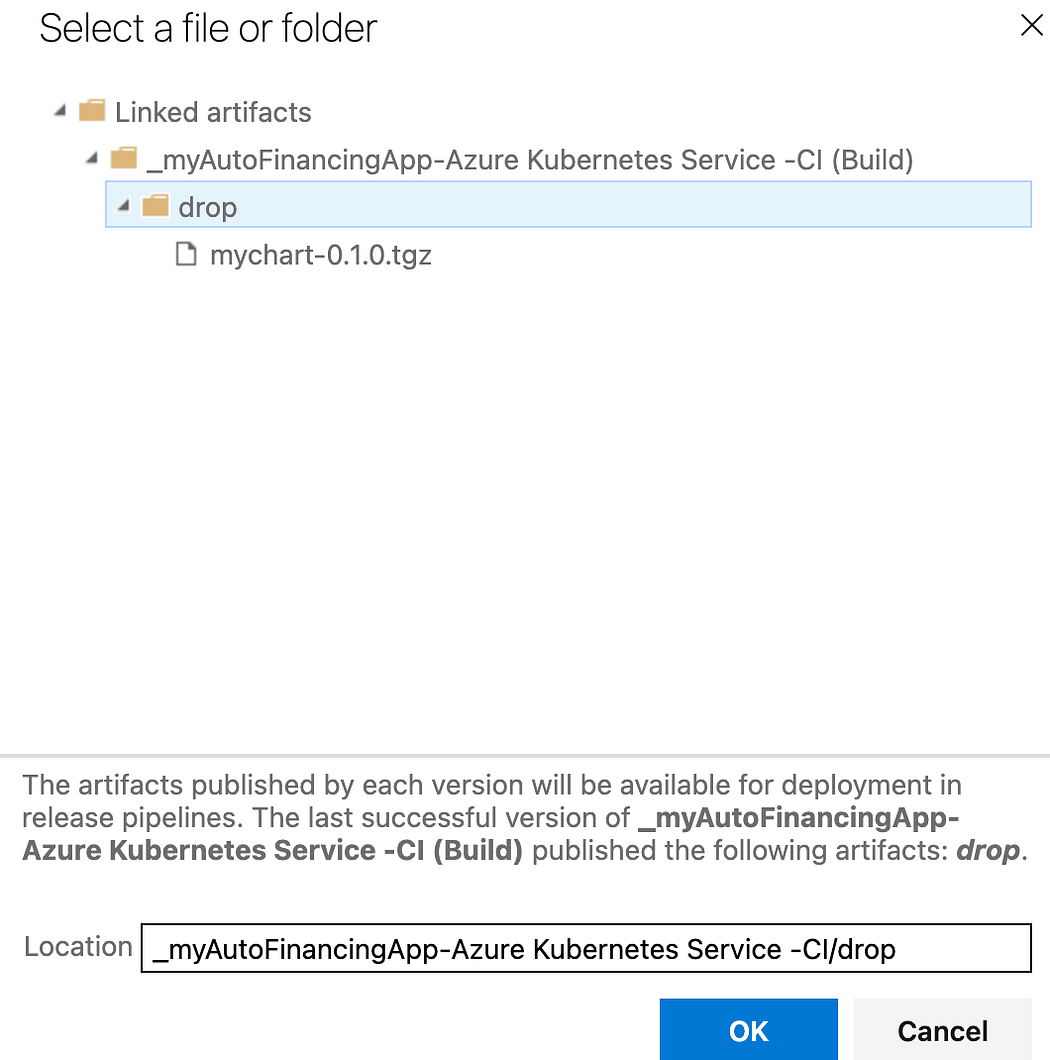
- Let’s start customizing helm upgrade task. Enter helm-deployment as namespace, chart type as File path and click on three dots.
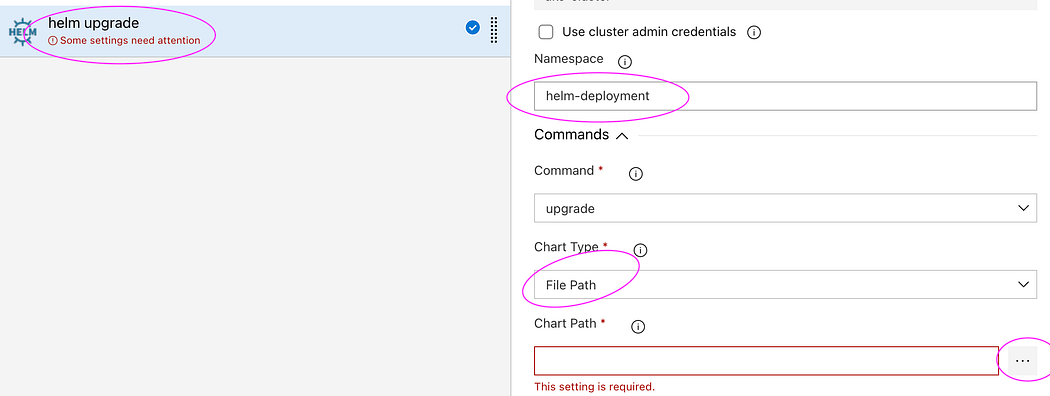
- Choose the package mychart-0.1.0.tgz and click ok.
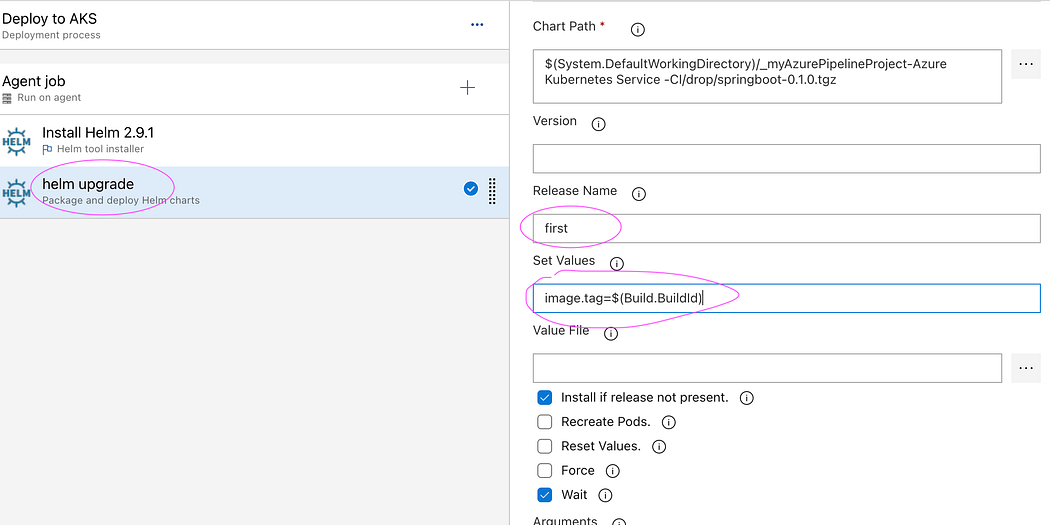
- Enter first as release name, enter the values below for set values:
image.tag=$(Build.BuildId)
- Now click on Save.
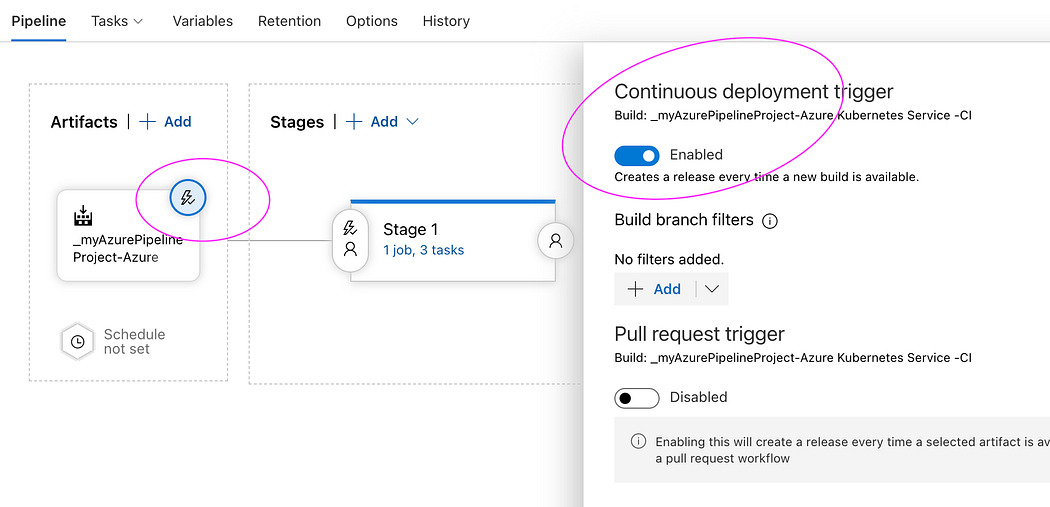
Optional step — Enable Continuous Deploy Trigger
- This will deploy microservices into AKS cluster for every new build in build pipeline.
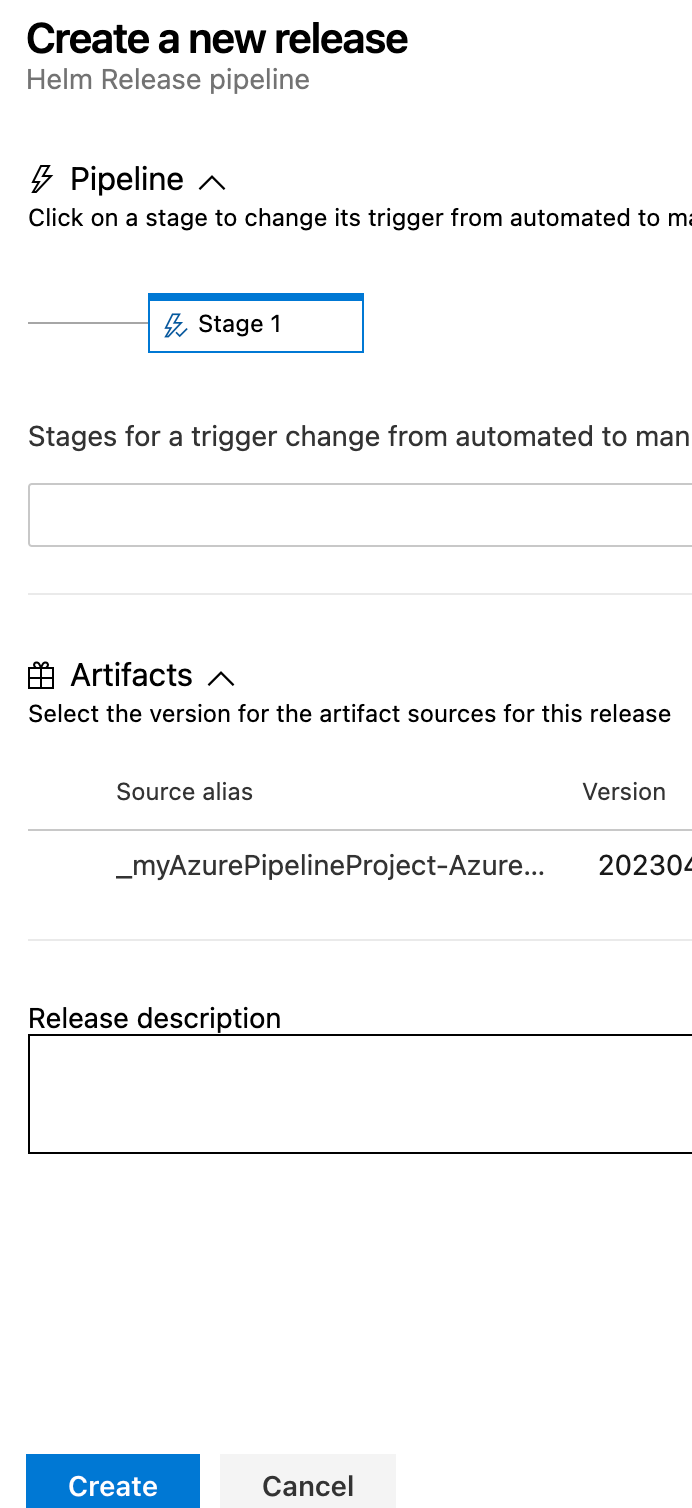
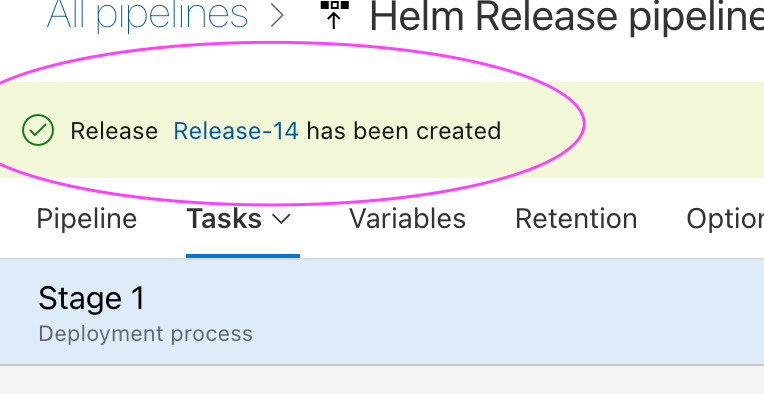
- Click on Create a release

- And then click Create
- Click on Release number to see the output
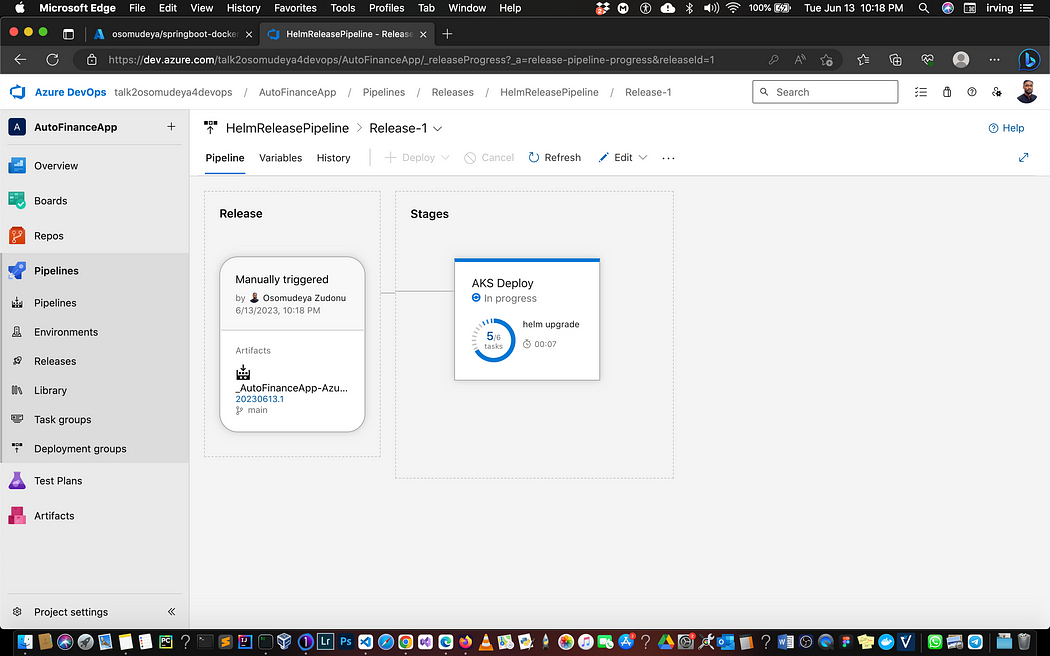
- Click on Stage to see the logs
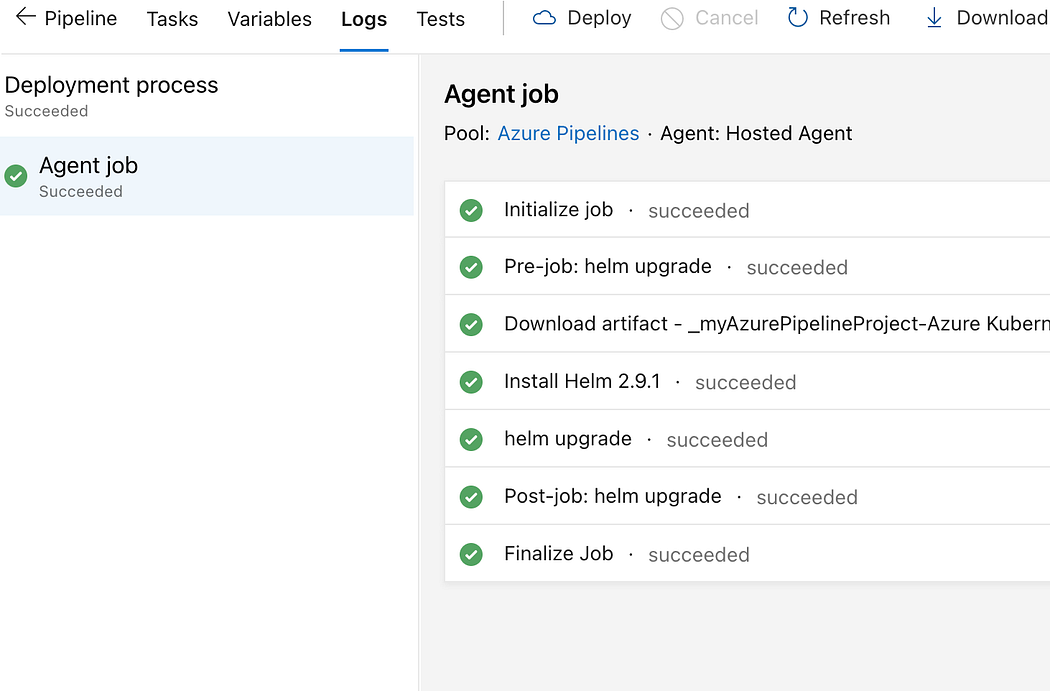
- Click on Logs, you will see the following tasks are in green to confirm Deployment was successful.
- Let’s check if deployment created any pods in helm-deployment namespace.
How to access Springboot Application using port forward locally?
kubectl get deployments -n helm-deployment

kubectl get pods -n helm-deployment

Get the pod name and use port forward to access locally
kubectl port-forward first-springboot-pod_name 8080 -n helm-deployment

If you see any errors after deploying the pods, you can check the pod logs.
kubectl describe pod <pod_name> -n helm-deployment
Go to your browser and enter http://localhost:8080
You should see web page below.

Clean up Resources
Now, let’s explore how we can tidy up the resources that were previously created. We can utilize the “az group delete” command to remove the resource group, AKS cluster, and any associated resources. Execute the command “az group delete — name aks-rg — yes — no-wait” to initiate the cleanup process.