Table of Contents:
- Understanding the Technologies
- Docker: Containerization for Consistent Environments
- Kubernetes: Orchestrating Containers at Scale(kops)
- Ansible: Automating Infrastructure Configuration
- AWS Elastic Container Registry (ECR): Secure Container Image Storage
- Building and Pushing the Docker Image to AWS ECR
- Setting up Docker CLI
- Creating a Dockerfile for Nginx Application
- Building the Docker Image
- Pushing the Docker Image to AWS ECR
- Creating Ansible Role for Kubernetes Deployment
- Defining the Role Structure
- Writing Ansible Tasks for Deployment
- Configuring Kubernetes Resources (Pods, Services, etc.)
- Applying the Ansible Role to the Kubernetes Cluster
- Creating Ansible Playbook for Nginx Application Deployment
- Defining the Playbook Structure
- Including the Kubernetes Deployment Role
- Specifying Variables and Configuration
- Executing the Playbook
- Verifying the Deployment
- Accessing the Nginx Website
- Testing Load Balancing and Scalability
- Monitoring the Cluster with Kubernetes Tools
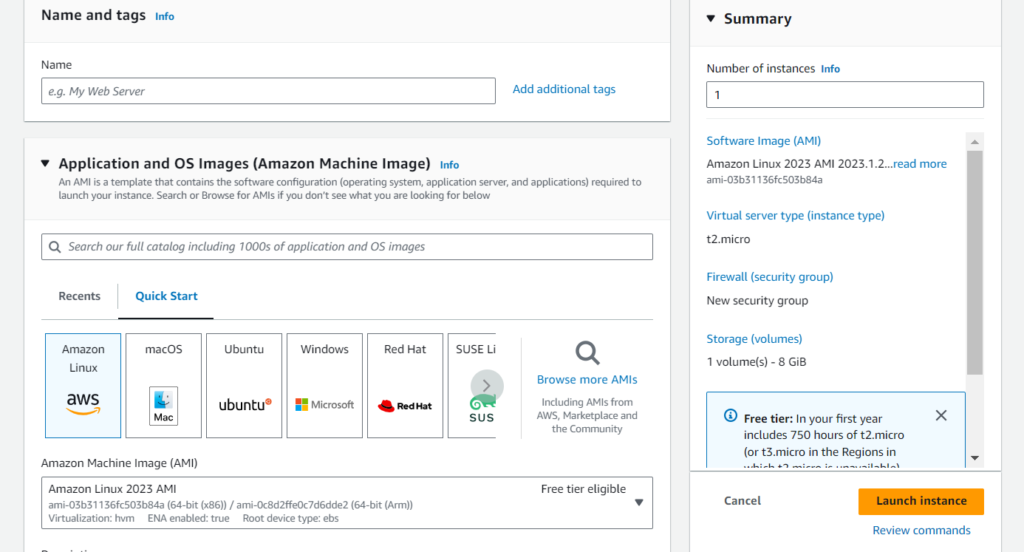
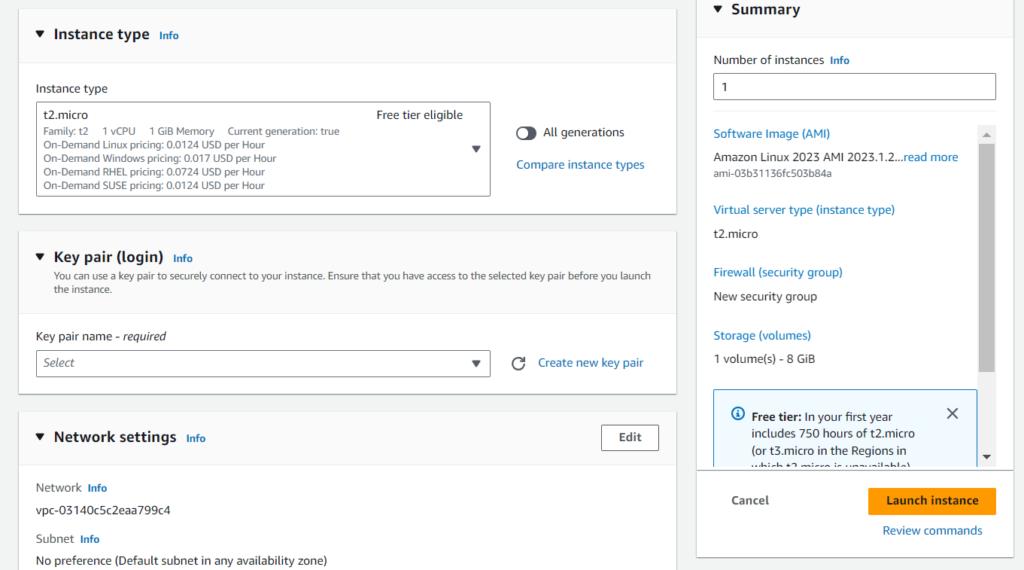
LAUNCH INSTANCE WITH T2.MICRO, 10 GB SSD, sg-ssh&all.


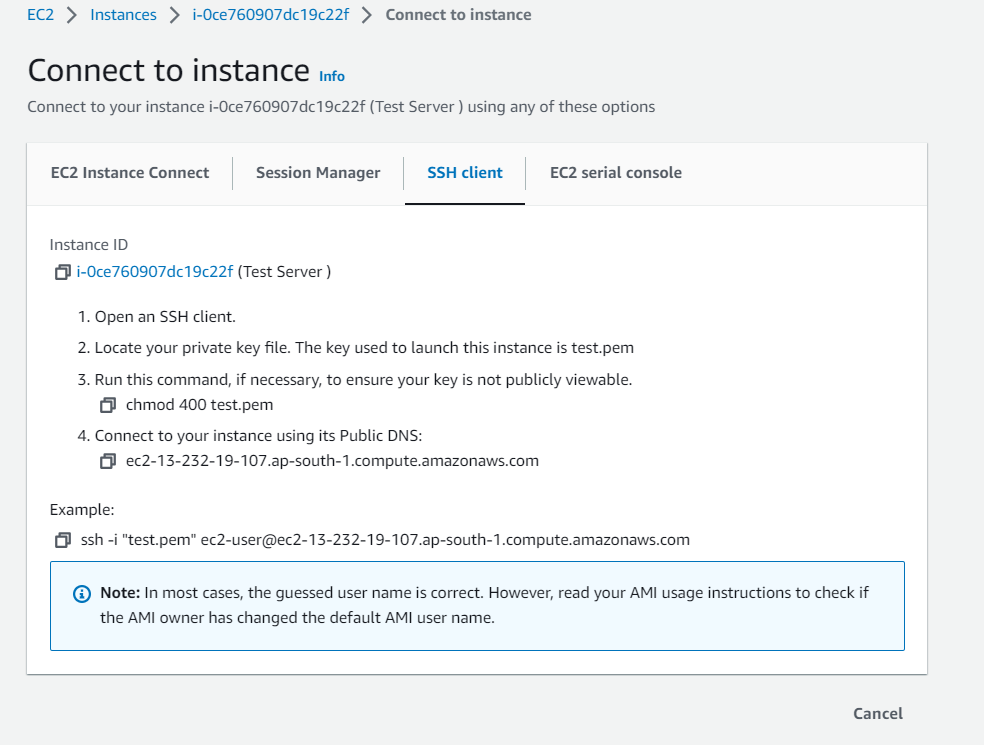
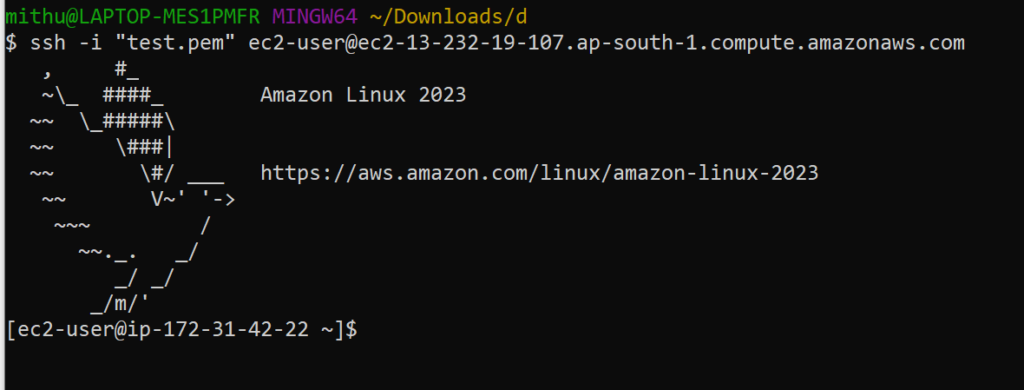
Now connect this workspace ec2 instance to the terminal. After connect the ec2 then update the packages

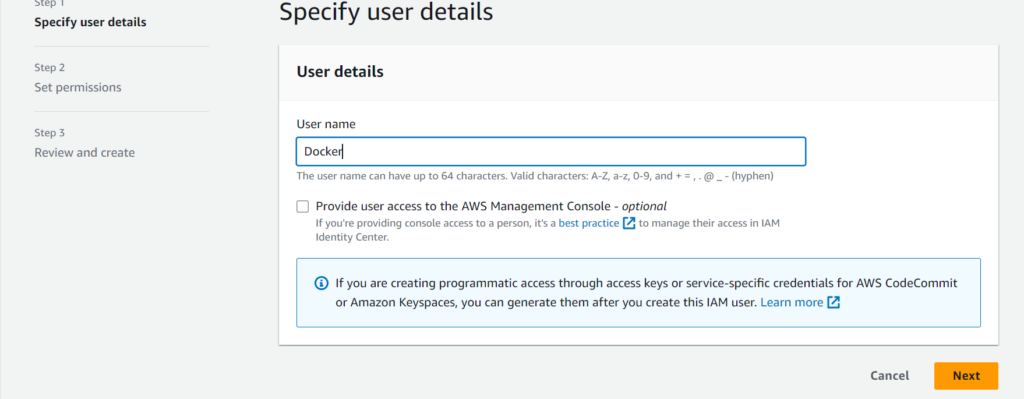
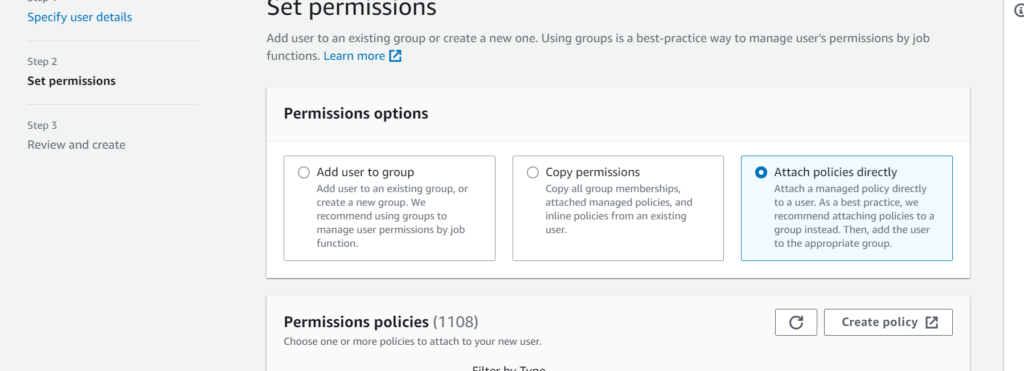
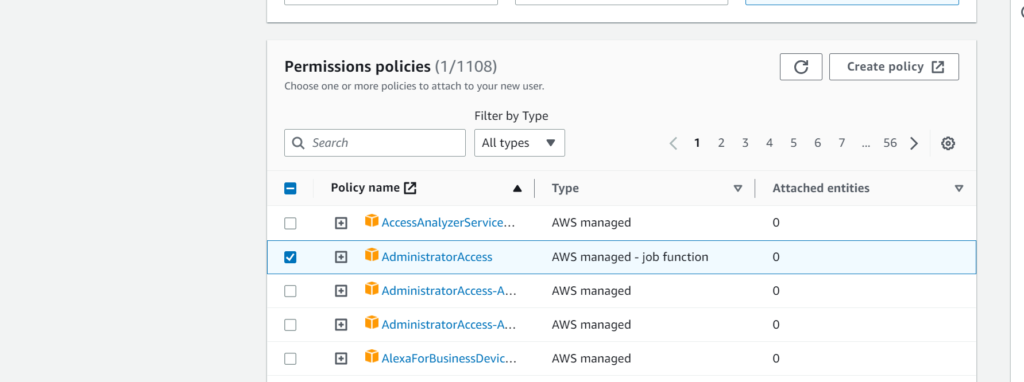
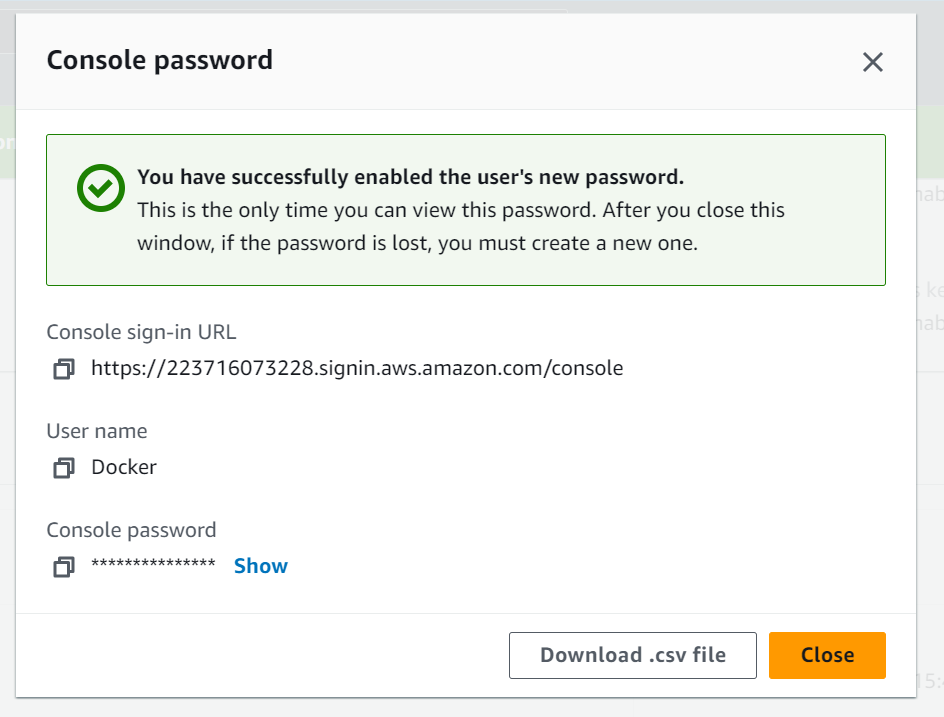
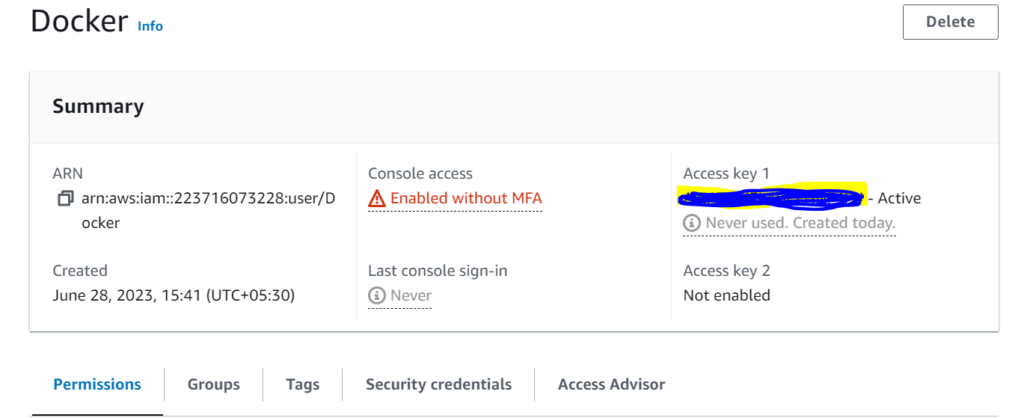
Now create an IAM user of CLI, generate an access key & secret key, and give admin access. Save the access key and secret key in notepad for further use.
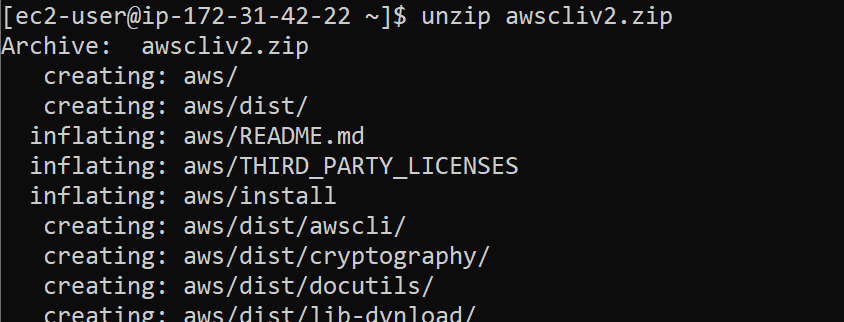
Now install Aws cli.
curl "https://awscli.amazonaws.com/awscli-exe-linux-x86_64.zip" -o "awscliv2.zip"

sudo yum install unzip

unzip awscliv2.zip
sudo ./aws/install

After installation of AWS CLI to set a path:
sudo vim .bashrc
export PATH=$PATH:/usr/local/bin/
source .bashrc
Now check the version
aws --version

Step-2
Install Kops and Kubectl for creating clusters of k8s (master and node) from the workspace ec2 instance
sudo wget https://github.com/kubernetes/kops/releases/download/v1.24.1/kops-linux-amd64
curl -LO "https://dl.k8s.io/release/$(curl -L -s https://dl.k8s.io/release/stable.txt)/bin/linux/amd64/kubectl"

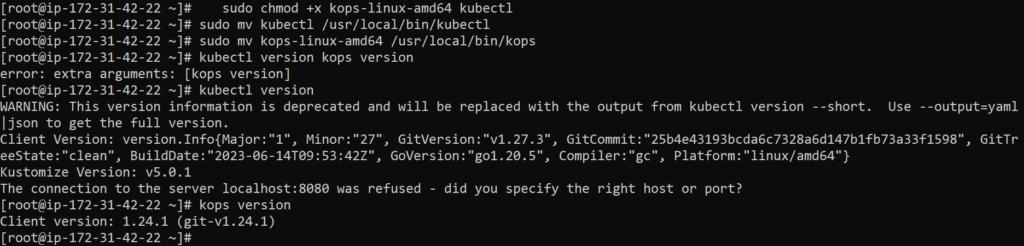
Change Permissions: sudo chmod +x kops-linux-amd64 kubectl
Move Files: sudo mv kubectl /usr/local/bin/kubectl
Move Files: sudo mv kops-linux-amd64 /usr/local/bin/kops
kubectl version
kops version
Step-3
Configure AWS CLI in workspace ec2 instance for creating k8s clusters and etcd of s3 bucket using kops commands.
First, configure aws cli:
aws configure

Now create an infrastructure of k8s cluster.
first, create etcd of k8s in aws using s3 bucket as Mumbai region.
aws s3api create-bucket --bucket sana.k8s.local --region ap-south-1 --create-bucket-configuration LocationConstraint=ap-south-1


Enable Bucket Version:
aws s3api put-bucket-versioning --bucket sana.k8s.local --region ap-south-1 --versioning-configuration Status=Enabled
EXPORT CLUSTER DATA INTO BUCKET:
export KOPS_STATE_STORE=s3://sana.k8s.local
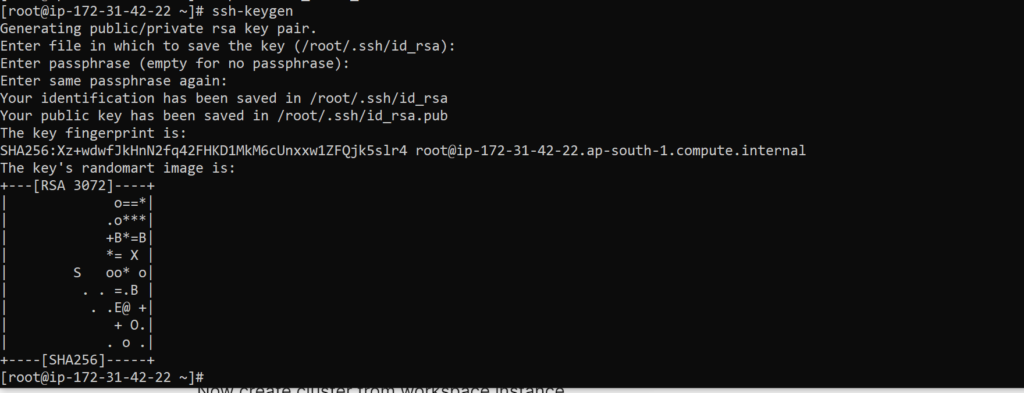
GENERATE-KEY for clusters:
ssh-keygen
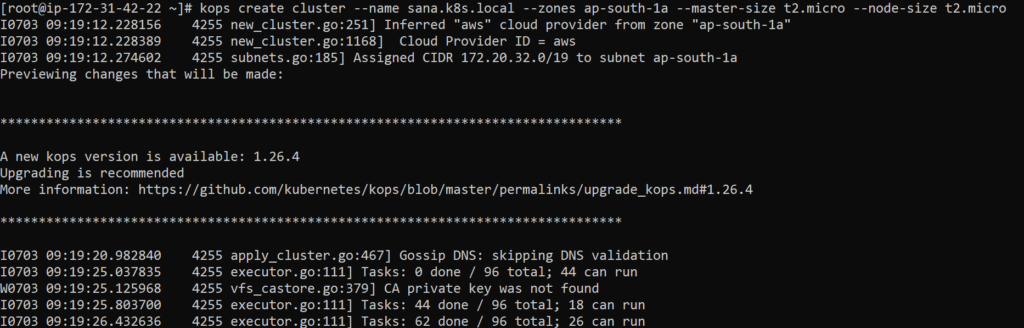
Now create cluster from workspace instance.
kops create cluster --name sana.k8s.local --zones ap-south-1a --master-size t2.medium --node-size t2.micro
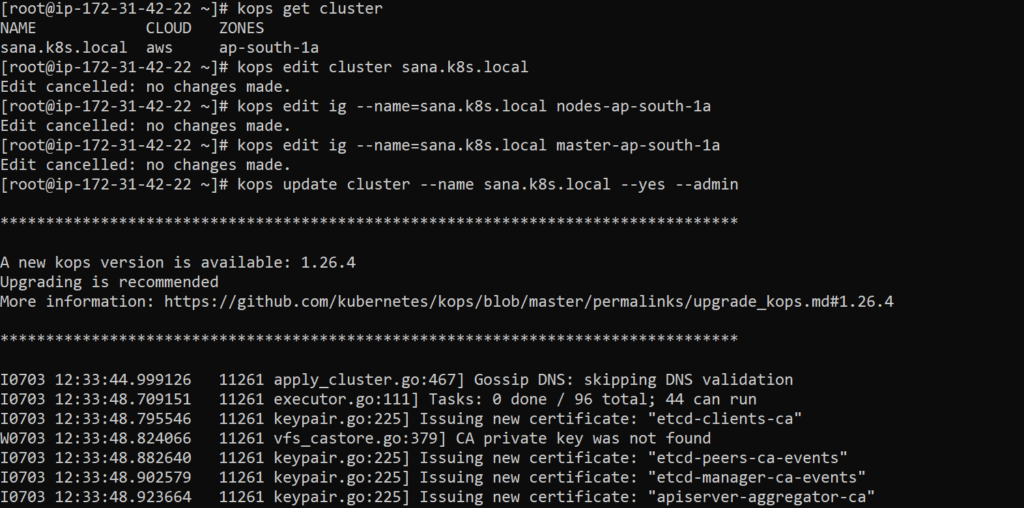
After creating cluster if u edit ur cluster follow this suggestion:
- list clusters with:
kops get cluster- edit this cluster with:
kops edit cluster sana.k8s.local- edit your node instance group:
-
kops edit ig --name=sana.k8s.local nodes-ap-south-1a - edit your master instance group:
kops edit ig --name=sana.k8s.local master-ap-south-1a
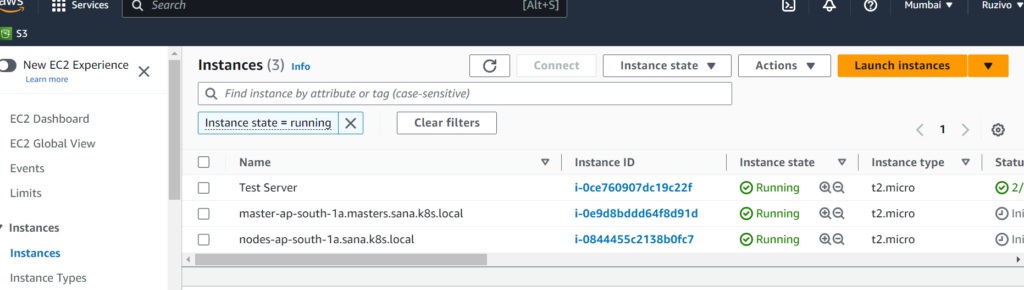
Now cluster is created and now run the cluster with help of this command.
kops update cluster --name sana.k8s.local --yes --admin

Step-4
Create Elastic Container Registry(ECR) in AWS.